This is a picture heavy post .. lots of pictures showing you
how I pieced and pressed this block.
Instead of just showing you how to make simple Flying Geese, we'll construct the first block of our Morning Star, Morning Bright Block of the Month.
 You'll start with cutting all your pieces:
Background:
A FOUR 3-1/2" squares
B FOUR 3-1/2" x 6-1/2" rectangles
Star:
C EIGHT 3-1/2" squares
Center:
D ONE 6-1/2" square
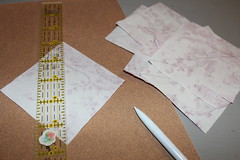
On the wrong side of all C squares, draw a line diagonally from corner to corner. I use a regular sharp or mechanical pencil. One good tip is to lay the square on a piece of fine sand paper so things don't scootch around. To preserve the markings on your ruler, apply one layer of clear packing tape and then trim around the ruler. Replace as necessary.
 Now you're ready to make the flying geese units for the block - you'll need four using pieces B and C.
Referring to the handout provided with the block directions (click here) you'll place one C square even with three edges of a B rectangle and sew directly on the drawn line. Press and check before trimming - be sure to allow that 1/4" seam allowance.
Your seam allowance will be pressed toward the corner of the flying goose (see illustration on the left) and if you sew those "waste" triangles together you won't lose them because we can use them later. Repeat with the opposite corner ... and you'll have a flying goose plus two "wasteful" half-square triangle units.
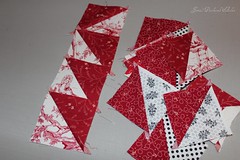 If you make a bunch of blocks you can end up with a pile of half-square triangle units. Some might accidentally be even just a tad funny.
Ok, I'm getting just a tad distracted here ...

 Once you have your flying geese units, you are ready to sew the block together in rows.
Press all seam allowances away from the geese.
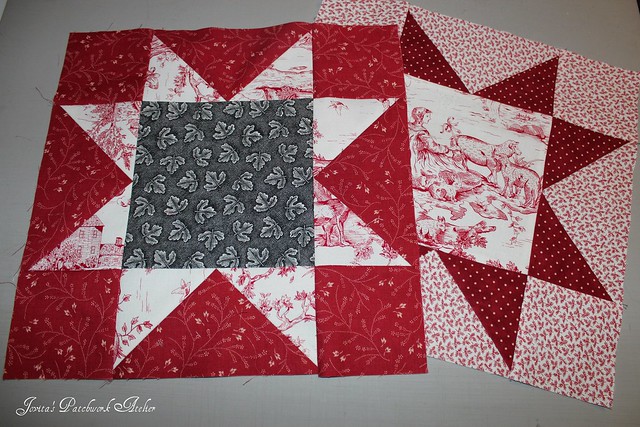
Then you can sew those rows together into a complete block.
Wait!
Are you wondering
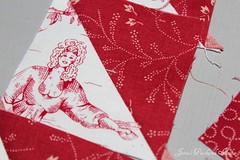
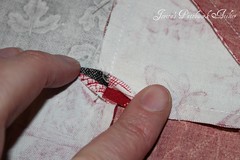
how I pressed those "they were too bulky" and now they're "funny looking" seams?
Here's a closeup.

I try to keep the "open" part of the seam as short as possible because I really AM . NOT . A . FAN of pressing seems open.
Then I flip the block over and press the rest of the seam from the right side. And yes, I always press from the right side so that I am sure my seams are completely pressed to the side.
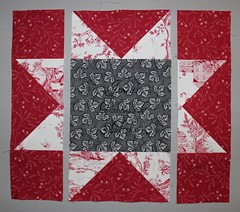
 So there you have it. A completed Morning Star block. Did I miss anything? Don't hesitate to tell me and I'll do my best to explain it further. In the meantime I'm off to get block two ready for you!
Happy sewing one and all and to all a wonderful flight! xox J
This is a very interesting way to press those corners so you don't get a build up of fabric anywhere. I have clipped it before to make it lay right, but always with a fear of clipping to far or having fabric fray to the front. I will be trying this method.
ReplyDelete